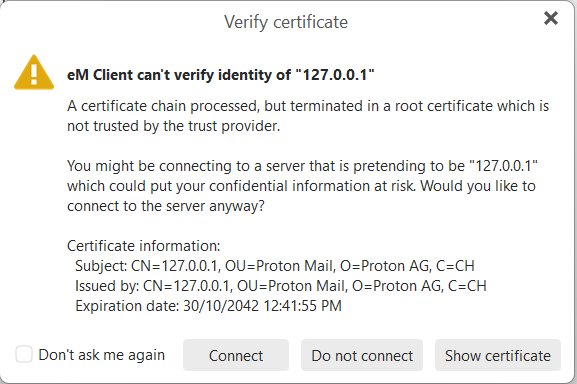
You may get this certificate warning, just choose don’t ask again and connect. You will need to do it twice.
That is all there is to it.
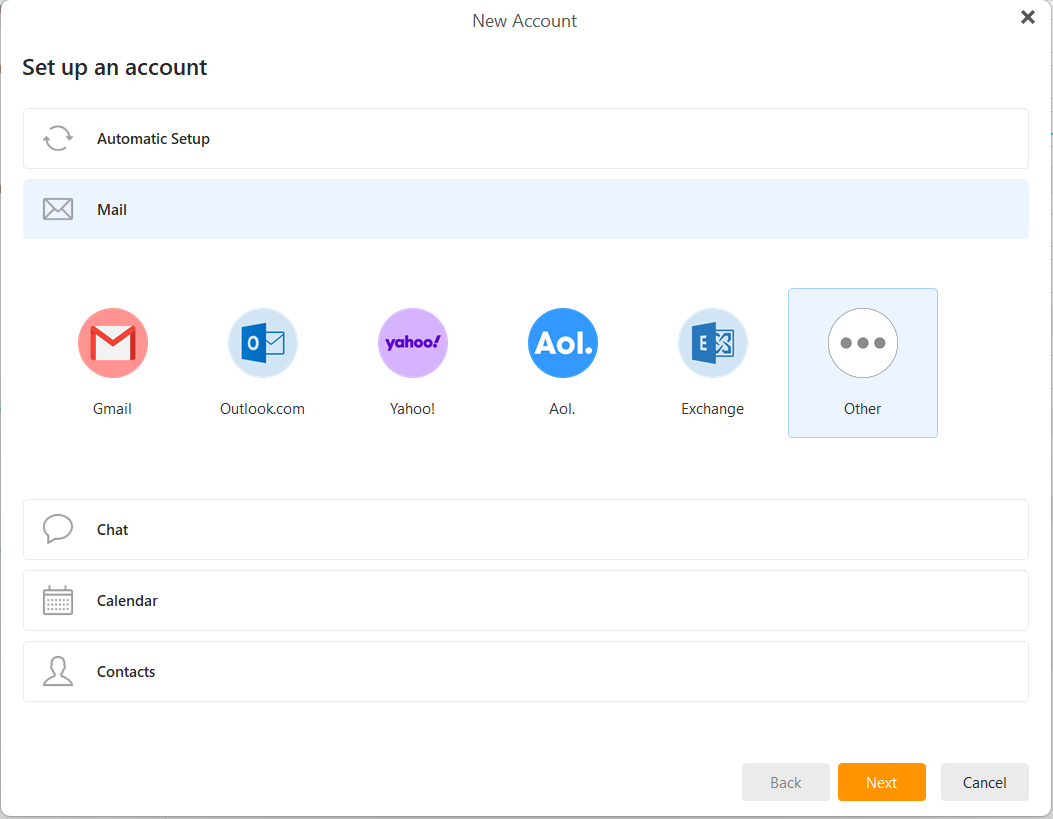
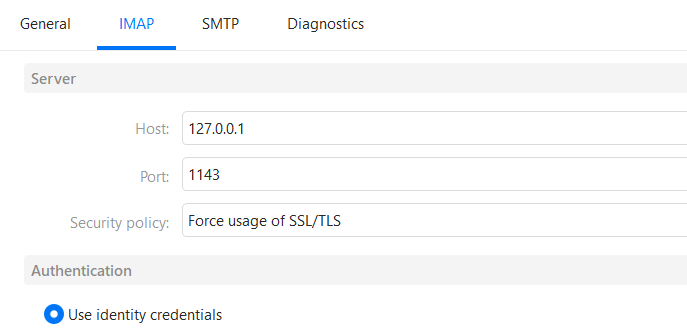
In eM Client Accounts, it will look like this:
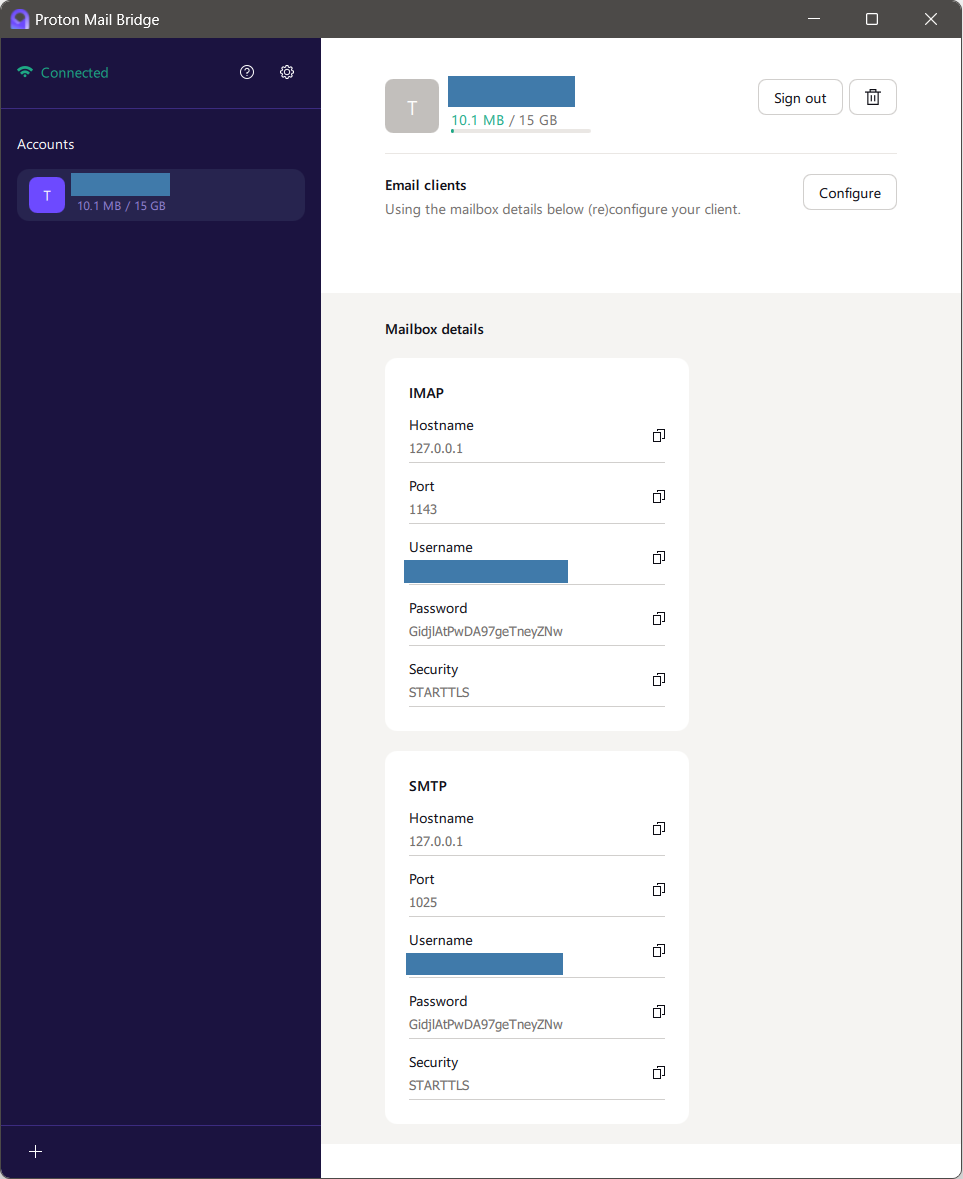
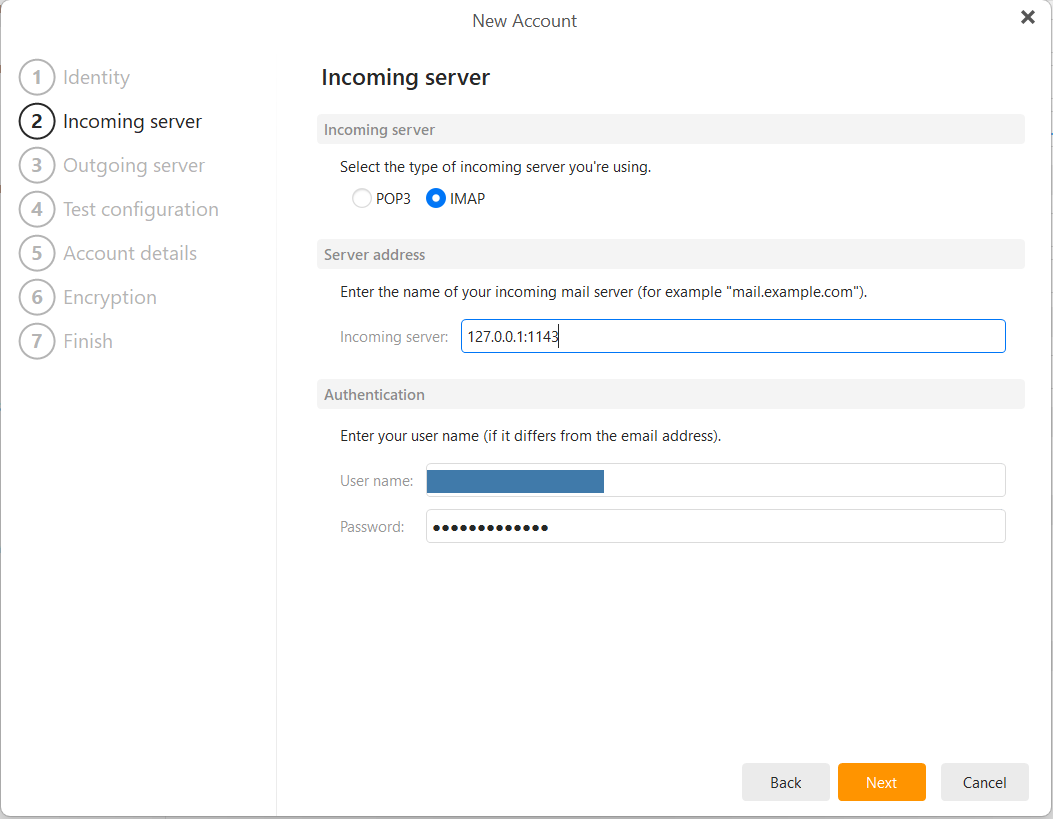
For IMAP
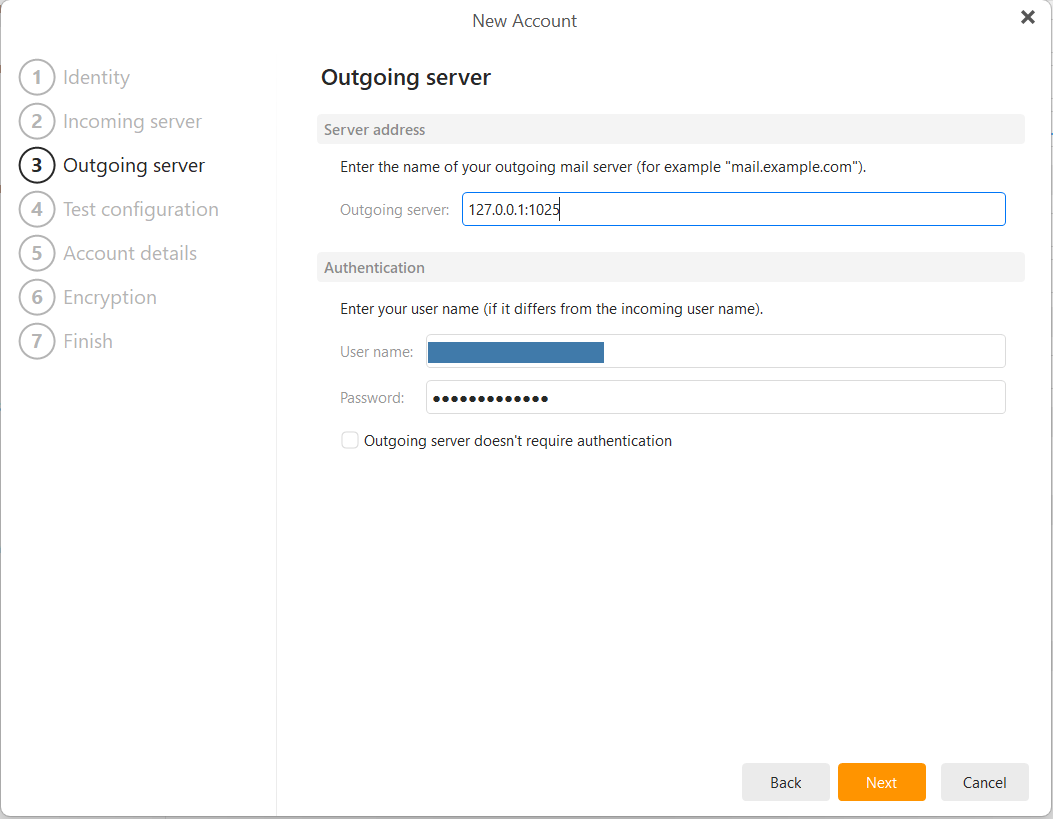
For SMTP
Please note that you can only use paid Protonmail accounts with the Bridge. Users with fee Protonmail accounts can’t use their address with email applications. They need to use the webmail page instead.
Thanks for sharing this step-by-step guide. It worked for me. Please update the title from “Ptotonmail Bridge Setup” to “Protonmail Bridge Setup” (my only comment).
The issue now is, when I setup my ProtonMail on eM Client, which credentials do I use? The “littlevatican.com” login used to login into ProtonMail or the original ProtonMail login information?
The reason I ask is because in the Proton Mail Bridge it uses my “littlevatican.com” credentials.
I only ask because when I use my “littlevatican.com” login information, all of my emails are duplicated in eM Client.
I have a frustrating situation where this process worked well on my Mac laptop but not on my Mac desktop (both running Sequoia 15.3.2). despite repeated tries, including deleting the account and reinstalling Proton Bridge, I get a "server not responding’ message for the SMTP server. Any suggestions?
eM Client for Mac 10.4.5326
Mac OS 26.4.1
ProtonMail Bridge v3.23.1
These steps drifted from reality at this point – I only got one, and never a second, “Verify Certificate” message – and subsequently the setup failed out with a critical error communicating with the local Proton Mail Bridge SMTP server. Of course the “Fix” button failed to fix anything. Then after entering the SMTP settings as instructed in the post above, I got a persistent “Server not responding” error that resetting the ProtonMail Bridge failed to fix:
I tried a few things and nothing fixed the problem. Because the SMTP server wasn’t set up, I was getting the exact same error as reported by @Heisenberg in this message.
The problem was that the SMTP protocol that eM Client wanted to use was set to “Use STARTTLS (if available)”, and the protocol that the Proton Mail Bridge defaults to using is “SSL”.
Because eM Client does not offer an “SSL” option (despite older threads I see here implying it did), I had to modify the ProtonMail Bridge to use STARTTLS for its SMTP server authentication protocol. Once I did this, eM Client worked fine with ProtonMail Bridge SMTP and this would, I believe, fix the problem reported two years ago by @Heisenberg .
To change ProtonMail Bridge’s local SMTP server to use STARTTLS, instead of its default SSL, I did this:
Open ProtonMail Bridge
Click on the “Gear” settings icon near the top-left of its modal dialog window
Clicked on “Advanced settings”
Found the entry, “Connection mode - Change the protocol Bridge and the email client use to connect for IMAP and SMTP.”, and clicked on the ‘Change’ button
Changed “SMTP Connection” entry from SSL, to STARTTLS, and hit the Save button
Now, it works fine. Note that I never received a second “Verify certificate” dialog in this process.
It is not clear to me how anyone ever succeeded with getting the ProtonMail Bridge working with eM Client, due to the default SMTP protocol setting mismatch.